 ICU Basics
Cheat Sheet
Tracheostomy Care and Emergencies
Tube parts and types, bedside equipment, routine care, speaking valves, the fresh trach, and the blocked, displaced or bleeding tube
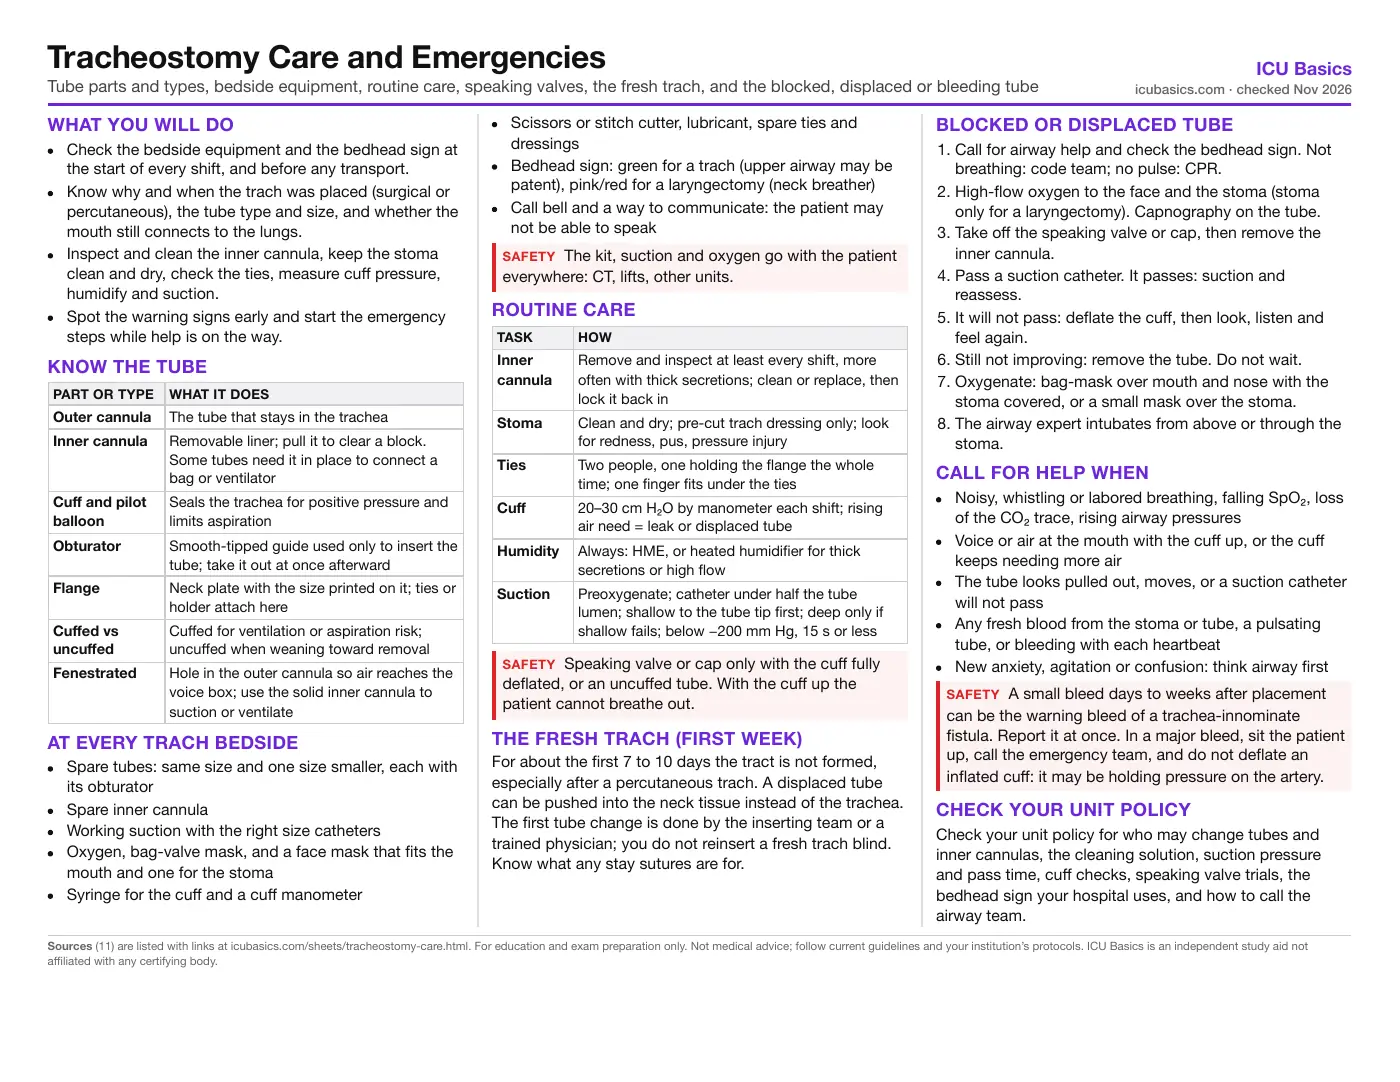
What you will do
- Check the bedside equipment and the bedhead sign at the start of every shift, and before any transport.
- Know why and when the trach was placed (surgical or percutaneous), the tube type and size, and whether the mouth still connects to the lungs.
- Inspect and clean the inner cannula, keep the stoma clean and dry, check the ties, measure cuff pressure, humidify and suction.
- Spot the warning signs early and start the emergency steps while help is on the way.
Know the tube
| Part or type | What it does |
|---|---|
| Outer cannula | The tube that stays in the trachea |
| Inner cannula | Removable liner; pull it to clear a block. Some tubes need it in place to connect a bag or ventilator |
| Cuff and pilot balloon | Seals the trachea for positive pressure and limits aspiration |
| Obturator | Smooth-tipped guide used only to insert the tube; take it out at once afterward |
| Flange | Neck plate with the size printed on it; ties or holder attach here |
| Cuffed vs uncuffed | Cuffed for ventilation or aspiration risk; uncuffed when weaning toward removal |
| Fenestrated | Hole in the outer cannula so air reaches the voice box; use the solid inner cannula to suction or ventilate |
At every trach bedside
- Spare tubes: same size and one size smaller, each with its obturator
- Spare inner cannula
- Working suction with the right size catheters
- Oxygen, bag-valve mask, and a face mask that fits the mouth and one for the stoma
- Syringe for the cuff and a cuff manometer
- Scissors or stitch cutter, lubricant, spare ties and dressings
- Bedhead sign: green for a trach (upper airway may be patent), pink/red for a laryngectomy (neck breather)
- Call bell and a way to communicate: the patient may not be able to speak
Routine care
| Task | How |
|---|---|
| Inner cannula | Remove and inspect at least every shift, more often with thick secretions; clean or replace, then lock it back in |
| Stoma | Clean and dry; pre-cut trach dressing only; look for redness, pus, pressure injury |
| Ties | Two people, one holding the flange the whole time; one finger fits under the ties |
| Cuff | 20–30 cm H₂O by manometer each shift; rising air need = leak or displaced tube |
| Humidity | Always: HME, or heated humidifier for thick secretions or high flow |
| Suction | Preoxygenate; catheter under half the tube lumen; shallow to the tube tip first; deep only if shallow fails; below −200 mm Hg, 15 s or less |
The fresh trach (first week)
For about the first 7 to 10 days the tract is not formed, especially after a percutaneous trach. A displaced tube can be pushed into the neck tissue instead of the trachea. The first tube change is done by the inserting team or a trained physician; you do not reinsert a fresh trach blind. Know what any stay sutures are for.
Blocked or displaced tube
- Call for airway help and check the bedhead sign. Not breathing: code team; no pulse: CPR.
- High-flow oxygen to the face and the stoma (stoma only for a laryngectomy). Capnography on the tube.
- Take off the speaking valve or cap, then remove the inner cannula.
- Pass a suction catheter. It passes: suction and reassess.
- It will not pass: deflate the cuff, then look, listen and feel again.
- Still not improving: remove the tube. Do not wait.
- Oxygenate: bag-mask over mouth and nose with the stoma covered, or a small mask over the stoma.
- The airway expert intubates from above or through the stoma.
Call for help when
- Noisy, whistling or labored breathing, falling SpO₂, loss of the CO₂ trace, rising airway pressures
- Voice or air at the mouth with the cuff up, or the cuff keeps needing more air
- The tube looks pulled out, moves, or a suction catheter will not pass
- Any fresh blood from the stoma or tube, a pulsating tube, or bleeding with each heartbeat
- New anxiety, agitation or confusion: think airway first
Check your unit policy
Check your unit policy for who may change tubes and inner cannulas, the cleaning solution, suction pressure and pass time, cuff checks, speaking valve trials, the bedhead sign your hospital uses, and how to call the airway team.
In depth
The one-page summary above is what the PDF prints. These sections go further.
Tube types in more detail
Tubes differ by maker, material (PVC, polyurethane, silicone), length, cuff, inner cannula and fenestration. The size on the flange is the internal diameter in millimeters; the outer diameter, length and curve vary between brands, so a "size 8" from one maker is not the same tube as another. Know the brand at your bedside.
- Dual-cannula tubes have a removable inner cannula. With some brands the 15 mm connector is on the inner cannula, so the tube cannot connect to a bag or ventilator without one in place: keep a spare.
- Single-cannula tubes have no liner to pull, so a block is cleared only by suction or a tube change; they need closer watching for secretion build-up.
- Adjustable-flange tubes are for a long skin-to-trachea distance (large neck, swelling from burns or capillary leak). Check where the flange is set every day; as swelling comes and goes the flange may need moving.
- Fenestrated tubes let air pass up through the larynx for speech and cough, but can let secretions in and can cause granulation tissue. For suction and for positive-pressure ventilation, fit the solid (nonfenestrated) inner cannula so the catheter goes down the trachea, not through the hole into the tracheal wall.
Suctioning: technique and evidence
The AARC 2022 guideline (Blakeman) suctions when there is a reason: secretions visible in the tube, coarse breath sounds, or a sawtooth pattern on the ventilator flow waveform. Preoxygenate. Use sterile technique for open suction; open and closed systems are both acceptable in adults. Avoid routine saline instillation.
| Item | AARC 2022 adult | NTSP manual |
|---|---|---|
| Catheter size | Occludes less than 50% of the lumen | No more than half the internal diameter |
| Pressure | Below −200 mm Hg | No more than −150 mm Hg for most patients |
| Time | 15 seconds or less per pass | 10 seconds or less |
| Depth | Deep only when shallow is ineffective | Shallow (to tube tip) is often enough |
Shallow suction stops at the end of the tube; measure the length on a spare tube of the same type. Deep suction advances until resistance (near the carina), then withdraws about 1 cm before applying suction. Thick, sticky secretions or a blocked inner cannula usually mean the humidification is not enough.
Humidification and secretions
A trach bypasses the nose and mouth, which normally warm and moisten the air. Breathing dry gas thickens secretions, impairs cilia and can block the tube completely. Every trach patient needs humidification. A heat and moisture exchanger (HME) suits many patients; change to a heated humidifier for thick or tenacious secretions, high oxygen flows, or a blocked inner cannula. Saline nebulizers can loosen secretions as an addition. Remove the HME along with any valve or cap in an emergency.
Cuff deflation, speaking valves and weaning
Weaning toward decannulation is a team decision (physician, RT, speech-language pathologist, nursing). The usual steps are cuff deflation trials, then a speaking valve or cap trial, sometimes a smaller or uncuffed tube, then removal. Before deflating, suction above the cuff (subglottic port if present) and the mouth, then deflate while suctioning down the tube, because pooled secretions above the cuff fall into the lungs.
A speaking valve is a one-way valve: air goes in through the tube and out through the larynx and mouth. A cap blocks the tube completely. Either one on a tube with an inflated cuff leaves the patient no way to exhale. NTSP advises that outside specialist areas these devices should not be used with cuffed tubes at all. Watch for fatigue: breathing around a tube in the trachea adds resistance, and a tiring patient needs the valve off.
Why the emergency steps run in that order
The NTSP algorithm (McGrath 2012) puts oxygenation ahead of securing a definitive airway, and works through the commonest fixable problems first. Oxygen goes to both the face and the stoma because, with a patent upper airway, either route may work. The inner cannula comes out before suction, because a blocked inner cannula is the commonest block and the easiest fix.
- Do not try to ventilate through a tube that may be displaced: forcing gas into the neck tissues causes surgical emphysema, pneumomediastinum and pneumothorax, and makes the stoma useless.
- Waveform capnography early: a CO₂ trace means the airway is at least partly patent.
- A tube that is blocked or displaced comes out as soon as that is clear, not as a last resort.
- After removal: bag-mask from above with the stoma covered, or a small (pediatric) face mask or a laryngeal mask held over the stoma.
- Secondary steps belong to the airway expert: oral intubation with an uncut tube advanced past the stoma, or a small trach or 6.0 cuffed ETT into the stoma, often over a bougie or fiberoptic scope.
Laryngectomy: the neck breather
After a laryngectomy the trachea ends at the neck stoma; the mouth and nose no longer connect to the lungs. These patients cannot be intubated or oxygenated through the mouth, and face-mask oxygen does nothing. Most laryngectomy stomas have no tube in place. In an emergency: oxygen to the stoma, remove any stoma cover and inner tube, pass a suction catheter, and ventilate through the stoma with a small mask or a laryngeal mask over it. Do not remove a voice prosthesis (tracheoesophageal puncture valve). If unsure whether the patient has a laryngectomy, give oxygen to the face too.
Bleeding and trachea-innominate fistula
Some oozing after a new trach is common and settles in a few days. Early bleeding (first few days) is usually from the skin edges, the thyroid, or anticoagulants and antiplatelets; low platelets often contribute. Later bleeding raises concern for granulation tissue, suction trauma, infection, and erosion into a large artery.
A trachea-innominate fistula is rare (about 0.1 to 1%) and often fatal. Grant 2006 put the peak at 7 to 14 days and says massive bleeding 3 days to 6 weeks after a trach is a fistula until proven otherwise; a 2025 review of 148 cases found a median of about 80 days, so it can come months later. A sentinel (warning) bleed preceded it in about 44% of cases. Risk factors are a low tube position, high cuff pressure, a malpositioned tube tip, excessive tube movement, radiation and prolonged intubation. A tube that pulses with the heartbeat lies close to a large vessel and needs urgent review the first time it is seen.
- Sit up, oxygen, vital signs, emergency call for active bleeding or more than about 10 mL of bright blood (NTSP).
- Call the team that placed the trach; get the airway expert.
- Hyperinflate the cuff to tamponade; if that fails, the expert may press a finger through the stoma against the artery.
- The airway is secured with the cuff below the bleed and the patient goes to the OR or interventional radiology.
Tube changes and the team
NTSP calls the first change, an early change (within days of a surgical trach or 7 to 10 days of a percutaneous one), a known difficult upper airway, a large neck, high ventilator or oxygen needs, granulation or tumor at the stoma, and an agitated patient the high-risk changes. These are usually done over a guide (bougie, exchange catheter or scope) by an experienced clinician. After a successful first change, later changes can be done by a trained, competent person with help and emergency equipment close by.
Trach-related adverse events account for about half of airway-related deaths and hypoxic brain injuries in critical care units (Brenner 2020). The Global Tracheostomy Collaborative names four drivers of safer care: staff training, multidisciplinary teamwork, involving patients and families, and tracking outcomes. Its database also linked any trach-related bleeding with higher mortality, another reason to report every bleed.
Related cheat sheets
- Your First Weeks in the ICUHow ICU orientation works, getting the most from your preceptor, organizing a shift, and speaking up for safety
- ICU Report Sheet: SBAR Brain Sheet for NursesA typical ICU shift hour by hour, a printable system-by-system report layout, SBAR handoff and what to check together at the bedside
- Drawing ICU Labs: Order of Draw, Cultures and Timed LabsOrder of draw, line draws without contamination, blood cultures, blood gases, labeling and the labs that run on a clock
- Daily Bedside Screens: Skin, Falls, Swallow and WithdrawalPressure injury risk, fall risk, the post-extubation swallow screen and CIWA-Ar, and what to do with each result
- Early Mobility in the ICUWhy it matters, a step-by-step progression, the safety screen before and stop criteria during a session, team roles, equipment and documentation
- Leaving the Unit: CT, MRI, IR, Cath Lab and ORIs the trip worth it, who goes, what travels, monitoring and handoff, then what to check at each destination
Sources
- National Tracheostomy Safety Project. Emergency tracheostomy management: patent upper airway (adult algorithm) and bedhead sign Link
- National Tracheostomy Safety Project. Emergency laryngectomy management (adult algorithm) and bedhead sign Link
- McGrath BA, Bates L, Atkinson D, Moore JA. Multidisciplinary guidelines for the management of tracheostomy and laryngectomy airway emergencies. Anaesthesia. 2012;67(9):1025-1041. doi:10.1111/j.1365-2044.2012.07217.x Link
- National Tracheostomy Safety Project. Comprehensive Tracheostomy Care (NTSP manual), 2013, and day-to-day management chapters (bedside equipment, inner tubes, cuff management, suctioning, tube changes, tube types) Link
- National Tracheostomy Safety Project. Tracheostomy emergencies: bleeding (based on Austin Health TRAMS guidance) Link
- Blakeman TC, Scott JB, Yoder MA, Capellari E, Strickland SL. AARC Clinical Practice Guidelines: Artificial Airway Suctioning. Respir Care. 2022;67(2):258-271. doi:10.4187/respcare.09548 Link
- Lewith H, Athanassoglou V. Update on management of tracheostomy. BJA Educ. 2019;19(11):370-376. doi:10.1016/j.bjae.2019.08.002 Link
- Brenner MJ, Pandian V, Milliren CE, et al. Global Tracheostomy Collaborative: data-driven improvements in patient safety through multidisciplinary teamwork, standardisation, education, and patient partnership. Br J Anaesth. 2020;125(1):e104-e118. doi:10.1016/j.bja.2020.04.054 Link
- Grant CA, Dempsey G, Harrison J, Jones T. Tracheo-innominate artery fistula after percutaneous tracheostomy: three case reports and a clinical review. Br J Anaesth. 2006;96(1):127-131. doi:10.1093/bja/aei282 Link
- Joshi KD, Singh A, Singh DK, et al. Tracheo-Innominate Artery Fistula: A Systematic Review of Diagnostic and Management Strategies. Otolaryngol Head Neck Surg. 2025;173(4):824-839. doi:10.1002/ohn.1333 Link
- Gunji S, Aron J, Lucas J, Kashmer D. Tracheostomy-related bleeding and stomal complications: a literature review. J Thorac Dis. 2026;18(10):1147. doi:10.21037/jtd-2026-1891 Link